个人博客开了一年多,平常大都是发布一下文章,写一下工作的感想,很多文章都用了图片,今天发现我好多图片都是后缀png的,而且尺寸都显得很大,要想然自己的博客文章打开的快速,减少读者的加载是一个工程,另外每个文章写的时候,里面有很多图片,最后都重新替换了,可很难找出那些是没有引用的,于是乎,有了这篇文章。
优化四部曲
- 更改图片格式,比如后缀为 png的改成JPEG
- 更改图片尺寸。比如原来是1000X600的 可以适当比例缩放
- 删除多余的没有用到的图片
- 优化网站链接
更改格式
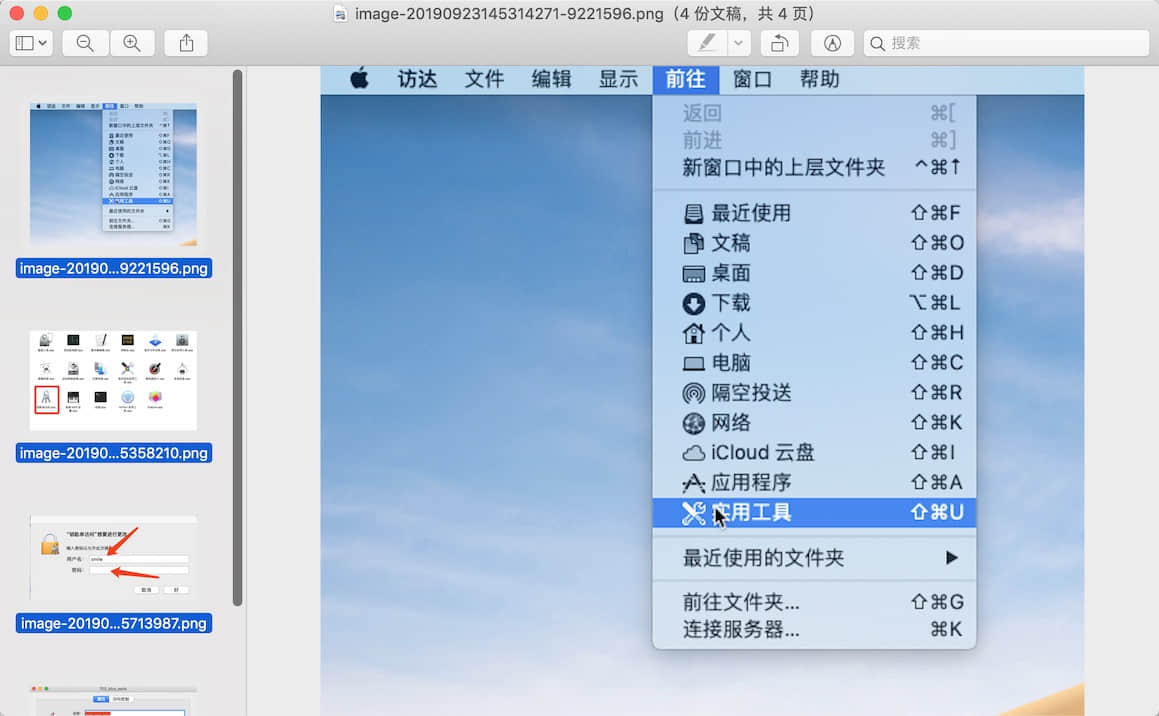
- Mac系统自带预览图片可以搞定
因为我文章不多,所以我一个个操作
比如我们这个文章的博客
我们打开文件夹,全选我们的图片
- 继续全选我们的图片
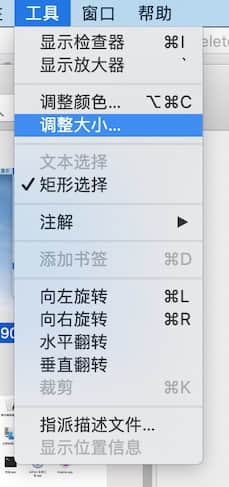
修改我们需要的满意的尺寸 我是按照百分比修改的
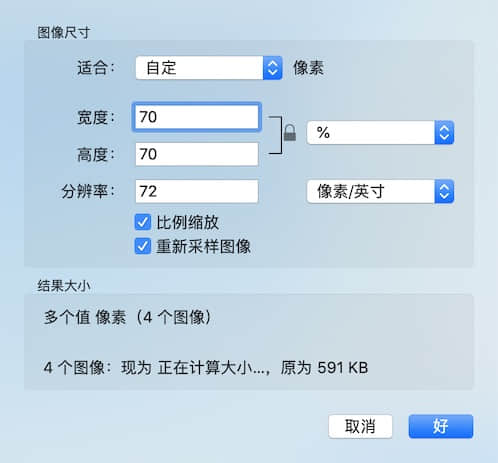
- 我们发现 图片尺寸已经 缩小
更改格式
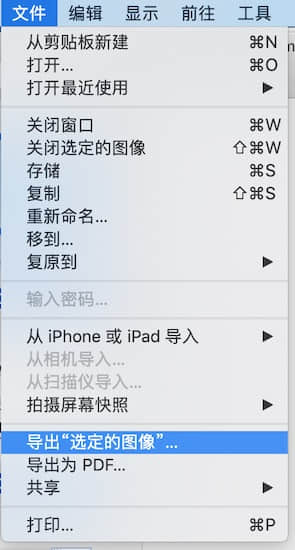
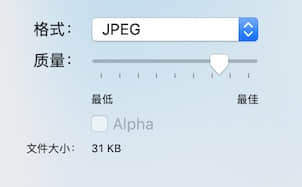
前面几步和上面一致,只是在打开编辑的时候选择的是 导出选定的图像
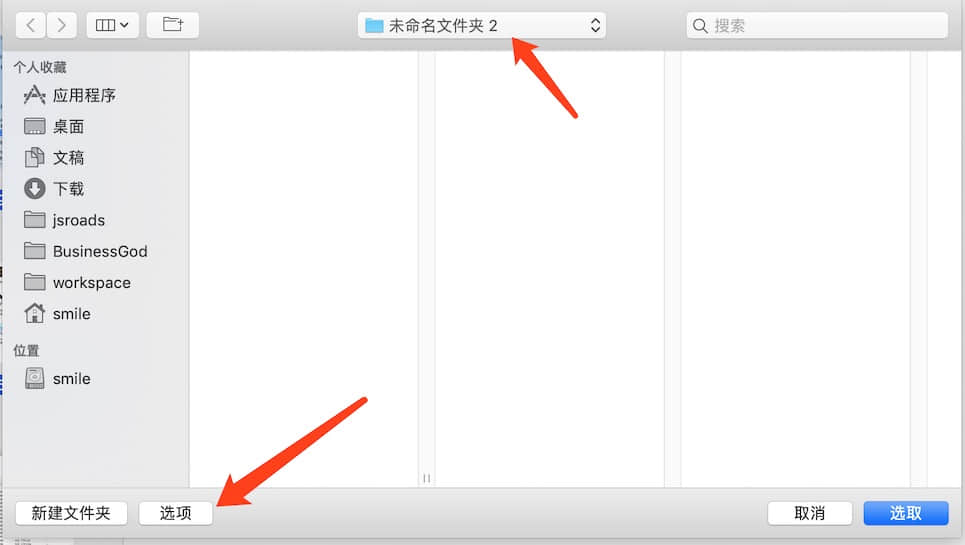
选择我们要存放的文件夹 和 选项 选择 格式
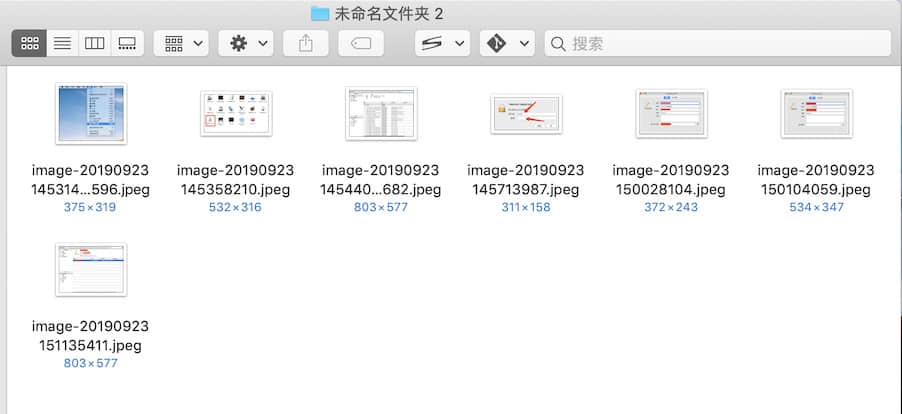
- 把生成的图片替换
- 我们用 Typora 编辑器打开我们的文章 选择查找 –替换 后缀名即可

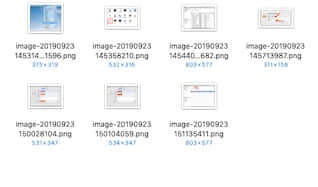
5.我们发现 可以正常显示我们新的图片了
删除多余的图片
这个我自己去看了 编辑器的设置没有这样的功能,就想着用Python3 自己写个脚本吧
脚本如下:
1 | #!/usr/bin/env -S -P${HOME}/anaconda/bin python |
下面是我的输出:
1 | 博客目录 ['/jsroads/blog/asroads.github.io/source/_posts/other', '/jsroads/blog/asroads.github.io/source/_posts/about', '/jsroads/blog/asroads.github.io/source/_posts/life', '/jsroads/blog/asroads.github.io/source/_posts/game', '/jsroads/blog/asroads.github.io/source/_posts/tool'] |
其实删除多余素材 并不能 加速 用户体验,但是对于自己日常开发要求干净的洁癖还是很重要的,自己试试吧。
删除冗余图片nodejs版本
blogDelUnusedPic.js 内容更新于2024-07-20
1 | const fs = require('fs'); |
上面是最新使用 nodejs 实现的脚本
关键点
imgPattern正则表达式捕获组使用(...)来捕获实际的图片路径。- 在
while ((matches = imgPattern.exec(content)) !== null)中,matches[1]包含实际的图片路径。 - 使用
const picUrl = path.join(sourcePath, actualPath);构建正确的图片路径,并将其加入mdList。 - 使用
decodeURI对mdList中的路径进行解码。 - 新增了
getAllFiles函数递归遍历目录,获取所有文件路径。 - 在
processBlogPath函数中调用getAllFiles获取所有文件,并处理每个文件。
使用方法
如果在命令行中提供路径,则脚本会自动去除路径前后的空格并处理路径下的文件:
1
node blogDelUnusedPic.js "/jsroads/blog/asroads.github.io/source/_posts"
如果没有提供路径,脚本会提示用户输入路径,然后去除空格并处理路径下的文件:
1
node blogDelUnusedPic.js
这样,脚本将递归遍历指定目录及其子目录,处理所有文件,确保 mdList 中的路径经过编码与 pngList 中的内容一致。
下面记录一下 Python3 常用的一些操作
1 | mport os |
1 | import os |
1 | import shutil,os |
1 | #通过in和not in关键字来判读一个list中是否包含一个元素 |
2
3
4
5
6
7
8
9
10
11
12
13
14
15
16
17
18
19
20
21
22
23
24
25
26
27
28
29
30
31
32
33
34
35
36
37
38
39
40
41
42
43
44
45
46
47
48
49
50
51
52
53
54
55
56
57
58
59
60
61
62
63
64
65
66
67
68
69
70
71
72
73
74
75
76
77
78
79
80
81
82
83
84
85
86
87
88
89
90
91
92
93
94
95
96
97
98
99
100
101
102
103
104
105
106
107
108
109
110
111
112
113
114
115
116
117
118
119
120
121
122
123
124
125
126
127
128
129
130
131
132
133
134
135
136
137
138
139
140
141
142
143
144
145
146
147
148
149
150
151
152
153
154
155
156
157
158
159
160
161
162
# -*- coding:utf-8 -*-
import re, os, shutil, time, sys, argparse
from itertools import chain
import oss2
# 需要替换url的MD文件
md_file = ''
# 操作类型, L2L (默认本地到本地), L2W(本地到图床), W2L(图床到本地)
action = 'L2L'
# 保存图片文件的根目录
dir_base = '/*******/_MD_Media'
# Markdown中图片语法  或者 <img src='' />
img_patten = r'!\[.*?\]\((.*?)\)|<img.*?src=[\'\"](.*?)[\'\"].*?>'
def get_img_local_path(md_file, path):
"""
获取MD文件中嵌入图片的本地文件绝对地址
:param md_file: MD文件
:param path: 图片URL
:return: 图片的本地文件绝对地址
"""
result = None
# /a/b/c
if path.startswith('/'):
result = path
# ./a/b/c
elif path.startswith('.'):
result = '{0}/{1}'.format(os.path.dirname(md_file), path)
# file:///a/b/c
elif path.startswith('file:///'):
result = path[8:]
result = result.replace('%20',' ')
else:
result = '{0}/{1}'.format(os.path.dirname(md_file), path)
return result
def local_2_local(md_file, dir_ts, match):
"""
把MD中的本地图片移动到指定目录下,并返回URL。 这里并没有进行URL的替换
:param md_file:
:param dir_ts:
:param match:
:return: new_url,新本地文件地址。如果不需要替换,就返回空
"""
dir_tgt = '{0}/{1}'.format(dir_base, dir_ts)
new_url = None
# 判断是不是已经是一个图片的网址,或者已经在指定目录下
if not (re.match('((http(s?))|(ftp))://.*', match) or re.match('{}/.*'.format(dir_base), match)):
# 如果图片url是本地文件,就替换到指定目录
img_file = get_img_local_path(md_file, match)
if os.path.isfile(img_file):
new_url = '{0}/{1}'.format(dir_tgt, os.path.basename(match))
os.makedirs(dir_tgt, exist_ok=True)
# 移动物理文件
shutil.move(img_file, dir_tgt)
return new_url
def local_2_web(md_file, dir_ts, match):
"""
把MD中的本地图片上传到OSS下,并返回URL。 这里并没有进行URL的替换
:param md_file:
:param dir_ts:
:param match:
:return: new_url,新本地文件地址。如果不需要替换,就返回空
"""
# 阿里云OSS信息
bucket_name = "b******ce"
endpoint = "http://oss-cn-beijing.aliyuncs.com"
access_key_id = "******"
access_key_secret = "******"
web_img_prfix = 'https://******.oss-cn-beijing.aliyuncs.com'
# 创建Bucket对象,所有Object相关的接口都可以通过Bucket对象来进行
bucket = oss2.Bucket(oss2.Auth(access_key_id, access_key_secret), endpoint, bucket_name)
new_url = None
# 判断是不是已经是一个图片的网址
if not (re.match('((http(s?))|(ftp))://.*', match) ):
# 如果图片url是本地文件,就上传
img_file = get_img_local_path(md_file, match)
if os.path.isfile(img_file):
key_url = '{0}/{1}'.format(dir_ts, os.path.basename(match))
bucket.put_object_from_file(key_url, img_file)
new_url = '{}/{}'.format(web_img_prfix, key_url)
return new_url
def replace_md_url(md_file):
"""
把指定MD文件中引用的图片移动到指定地点(本地或者图床),并替换URL
:param md_file: MD文件
:return:
"""
if os.path.splitext(md_file)[1] != '.md':
print('{}不是Markdown文件,不做处理。'.format(md_file))
return
cnt_replace = 0
# 本次操作时间戳
dir_ts = time.strftime('%Y-%m-%d-%H-%M-%S', time.localtime())
with open(md_file, 'r',encoding='utf-8') as f: #使用utf-8 编码打开
post = f.read()
matches = re.compile(img_patten).findall(post)
if matches and len(matches)>0 :
# 多个group整合成一个列表
for match in list(chain(*matches)) :
if match and len(match)>0 :
new_url = None
# 进行不同类型的URL转换操作
if action == 'L2L':
new_url = local_2_local(md_file, dir_ts, match)
elif action == 'L2W':
new_url = local_2_web(md_file, dir_ts, match)
# 更新MD中的URL
if new_url :
post = post.replace(match, new_url)
cnt_replace = cnt_replace + 1
# 如果有内容的话,就直接覆盖写入当前的markdown文件
if post and cnt_replace > 0:
open(md_file, 'w', encoding='utf-8').write(post)
print('{0}的{1}个URL被替换到<{2}>/{3}'.format(os.path.basename(md_file), cnt_replace, action, dir_ts))
elif cnt_replace == 0:
print('{}中没有需要替换的URL'.format(os.path.basename(md_file)))
if __name__ == '__main__':
parser = argparse.ArgumentParser()
parser.add_argument('-f', '--file', help='文件Full file name ofMarkdown file.')
parser.add_argument('-a', '--action', help='操作类型: L2L, L2W, W2L .')
parser.add_argument('-d', '--dir', help='Base directory to store MD images.')
args = parser.parse_args()
if args.action:
action = args.action
if args.dir:
dir_base = args.dir
if args.file:
replace_md_url(args.file)
优化链接地址
hexo默认的链接是http://xxx.xxxx.com/2019/09/25/hello-world这种类型的,这源于站点目录下的配置_config.yml里的配置:permalink: :year/:month/:day/:title/.这种默认配置的缺陷是就是一般我们文章的名字是中文的时候,链接地址就会会出现一大串,此外不利于seo。年月日都会有分隔符。下面就优化一下链接
- 使用
hexo-abbrlink这个插件 - 后期修改一下
hexo-asset-image配置 完美解决
安装插件(在你的本地网站目录)
1 | npm install hexo-abbrlink --save |
在站点配置文件中查找代码permalink,将其更改为:
1 | permalink: post/:abbrlink.html |
然后去修改我们的 网站目录下面的 scaffolds目录 下面的 post.md
1 | --- |
这样 之后,我们重新 运行 hexo clean 和 hexo g 发现我们的网址 已经变了
PS:2020年1月11日 我更新插件后 发现 已经 可以自动匹配了 所以 下面的这个解决方案 可以忽略了
下面是最新的代码 已经 不需要修改了
1 | if ($(this).attr('src')){ |
但是此时我发现和我另外一个插件有图片链接的冲突,我的图片地址找不到正确的链接,此时我们去修改我们的插件
打开我们的插件目录 找到 对应的xxx\node_modules\_hexo-asset-image@0.0.3@hexo-asset-image\index.js文件修改部分代码(这个根据你的情况修改,我的如下)在源码的12行附近var link = data.permalink;这一行的下面,添加 一行var abbrlink = data.abbrlink(声明一个变量 为 abbrlink)在44行附近,修改代码 原代码
1
2
3if(linkArray[linkArray.length - 1] == srcArray[0])
srcArray.shift();
src = srcArray.join('/');修改后:1
2
3
4if(linkArray[linkArray.length - 1] == srcArray[0])
srcArray.shift();
if(srcArray[0]!==abbrlink)srcArray[0]=abbrlink;
src = srcArray.join('/');直接贴上我最后的修改文件吧:index.js1
2
3
4
5
6
7
8
9
10
11
12
13
14
15
16
17
18
19
20
21
22
23
24
25
26
27
28
29
30
31
32
33
34
35
36
37
38
39
40
41
42
43
44
45
46
47
48
49
50
51
52
53
54;
var cheerio = require('cheerio');
// http://stackoverflow.com/questions/14480345/how-to-get-the-nth-occurrence-in-a-string
function getPosition(str, m, i) {
return str.split(m, i).join(m).length;
}
hexo.extend.filter.register('after_post_render', function(data){
var config = hexo.config;
if(config.post_asset_folder){
var link = data.permalink;
var abbrlink = data.abbrlink
var beginPos = getPosition(link, '/', 3) + 1;
// In hexo 3.1.1, the permalink of "about" page is like ".../about/index.html".
var endPos = link.lastIndexOf('/') + 1;
link = link.substring(beginPos, endPos);
var toprocess = ['excerpt', 'more', 'content'];
for(var i = 0; i < toprocess.length; i++){
var key = toprocess[i];
var $ = cheerio.load(data[key], {
ignoreWhitespace: false,
xmlMode: false,
lowerCaseTags: false,
decodeEntities: false
});
$('img').each(function(){
// For windows style path, we replace '\' to '/'.
var src = $(this).attr('src').replace('\\', '/');
if(!/http[s]*.*|\/\/.*/.test(src)){
// For "about" page, the first part of "src" can't be removed.
// In addition, to support multi-level local directory.
var linkArray = link.split('/').filter(function(elem){
return elem != '';
});
var srcArray = src.split('/').filter(function(elem){
return elem != '';
});
if(linkArray[linkArray.length - 1] == srcArray[0])
	    srcArray.shift();
	  if(srcArray[0]!==abbrlink)srcArray[0]=abbrlink;
         src = srcArray.join('/');
$(this).attr('src', '/' + link + src);
// $(this).attr('src' , '/' + link + abbrlink + '/' + src);
}
});
data[key] = $.html();
}
}
});- 重新hexo clean 和 hexo g,即可生效。
注意:最后这个冲突问题,你根据自己目录实际需要修改代码即可
原文部分引用
方法如下
编辑
xxx\node_modules\_hexo-asset-image@0.0.3@hexo-asset-image\index.js文件
1、在源码的12行附近var link = data.permalink;这一行的下面,添加 一行var abbrlink = data.abbrlink
(意思是定义一个变量abbrlink)
2、在44行附近,源码的$(this).attr('src' , '/' + link + src);这一行,修改 为下面一行:$(this).attr('src' , '/' + link + abbrlink + '/' + src);
(意思是生成的图片链接中,拼接abbrlink)然后重新hexo clean 和 hexo g,即可生效。
_posts文件夹下的文章,按照自己喜欢的方式整理,生成的链接是正常的,在typora中可以正常显示。
如果你的permalink加了后缀的话, 例如我的 permalink: p/:abbrlink.html编辑xxx\node_modules_hexo-asset-image@0.0.3@hexo-asset-image\index.js文件, index多减个值
1 | if(/.*\/index\.html$/.test(link)) { |
2021-09-22 更新
如果使用最新的hexo 版本 5.x 和 最新的插件版本 发现 源码已经改变了,如果遇到图片不能正常显示,此时需要检查网页的源代码:
此时 config.yml 文件
1 | url: https://jsroads.gitee.io |
但是我们打印出来的图片路径 是:
1 | update link as:-->/.io//image-20210922130821755.png |
经过查找问题出在 项目根目录/node_modules/hexo-asset-image/index.js的23行左右
1 | if(/.*\/index\.html$/.test(link)) { |
发现 这个走了 else 分支导致的,我们把 link.lastIndexOf('.') 修改为 link.lastIndexOf('/') 即可 修改后
1 | if(/.*\/index\.html$/.test(link)) { |
重新 清理运行 : hexo clean & hexo g
1 | update link as:-->/2021/09/18/hello-world/image-20210922130821755.png |
然后运行效果 正常 以上OK
后记
其实很多事情,有了目标,就朝着这个目标努力,虽然未必能真正做到自己最初的想法,但是起码不会原地不动,至少是开卷有益,有时候还有意外的学习收获。