今天看到新闻,Laya官方更新了新版本,新版本很多优势,有了很多更新,看到公众号下面有人留言说,希望有个外置的代码编辑器,其实我从学习开发Layabox一直都是用的Webstorm外置编辑器,打开了两个IDE,Webstorm主攻代码,配置了编译,LayaboxIDE主攻美术和项目构建。整体来讲和Cocos开发差不多,效率很快,特别是再用上快捷键。下面我就把这个配置分享一下,希望更多的人能够提高效率。
软件下载
环境配置
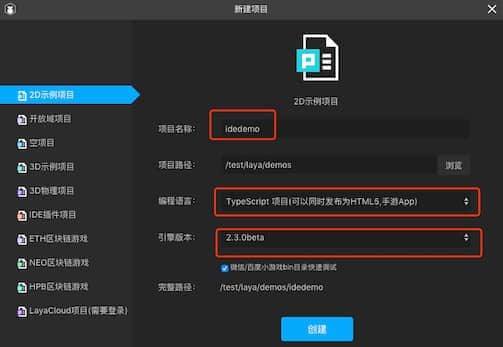
- 首先打开我们的Layabox

- 新建一个项目 我这边起名字 idedemo
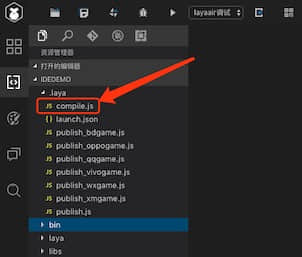
- 我们看到 Layabox 的编译文件处于 .laya 文件夹下
- 我们打开我们Webstorm软件

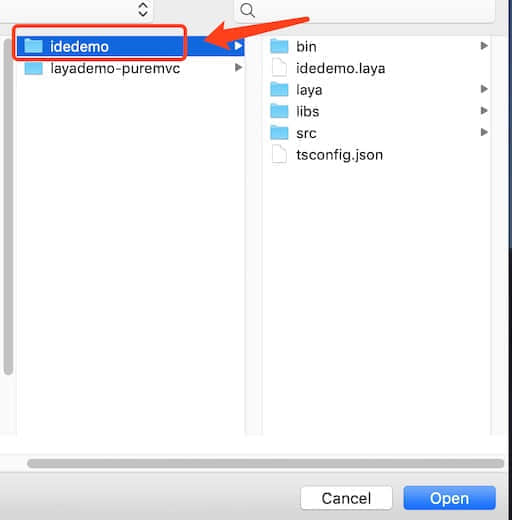
- 我们用Webstorm 打开我们刚刚新建的项目 选择项目文件夹即可
- 我们打印一下compile.js文件的里面的 process.argv,准备替换(我们用LayaboxIDE)点击那个编译按钮,然后就能看的参数的值

1 | ["/Applications/LayaAirIDE_beta2.3.0.app/Contents/Frameworks/Code Helper.app/Contents/MacOS/Code Helper","/Applications/LayaAirIDE_beta2.3.0.app/Contents/Resources/app/node_modules/gulp/bin/gulp.js","--gulpfile=/test/laya/demos/idedemo/.laya/compile.js","compile"] |
- 我们观察这个compile.js文件发现 Laya集合了几个工具
- gulp
- rollup
- rollup-plugin-typescript2
- rollup-plugin-glsl
- 我们接下来用npm 安装上面几个插件
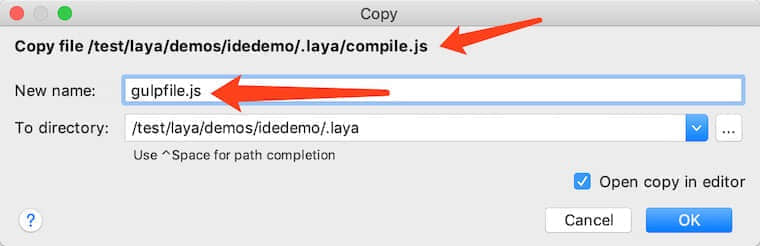
- 安装成功后,在.laya目录下复制 compile.js 新建一个名字为 gulpfile.js (必须是这个名字)
- 右键菜单 选择
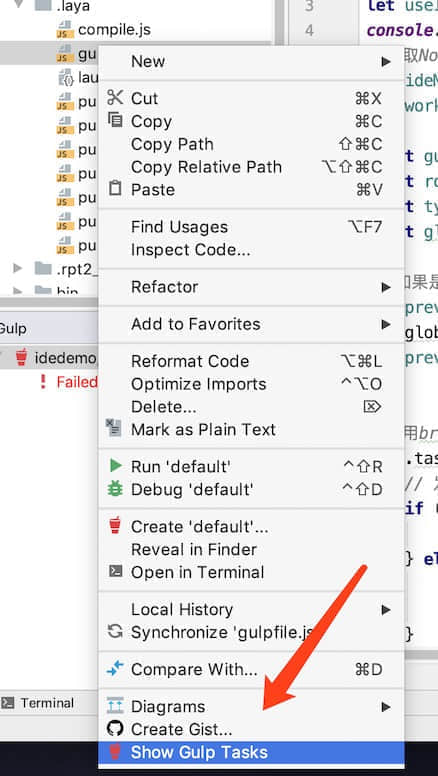
- 修改我们这个参数配置
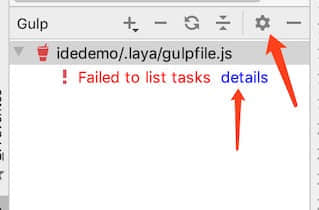
主要是修改我们这个 gulp 路径
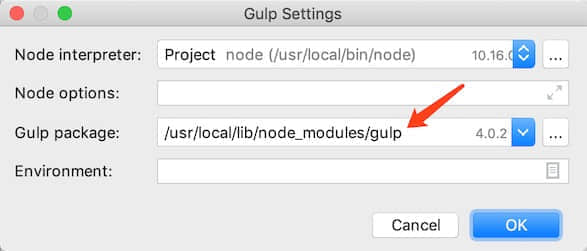
选择 Layabox 自带的 gulp 文件夹
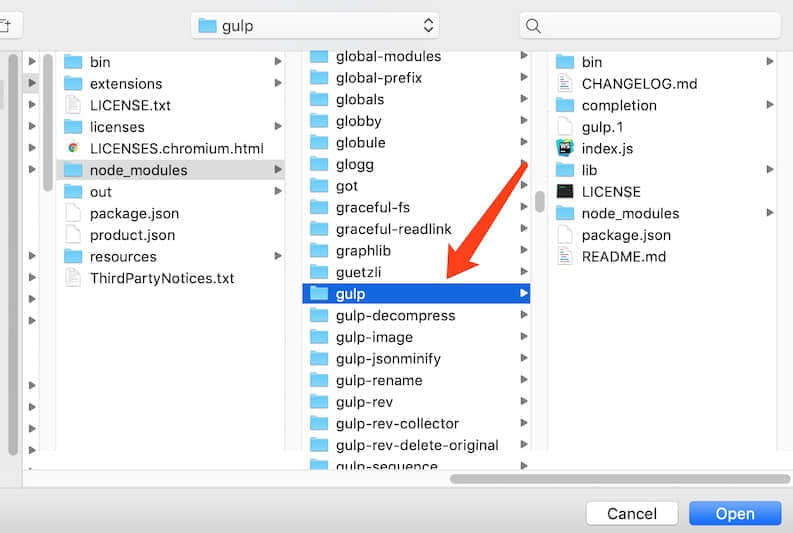
具体路径地址(你根据自己地址写)
1 | /Applications/LayaAirIDE_beta2.3.0.app/Contents/Resources/app/node_modules/gulp |
- 接下来修改 我们新建的文件 gulpfile.js 的代码
原代码
1 | let useIDENode = process.argv[0].indexOf("LayaAir") > -1 ? true : false; |
修改为
1 | let addvalue = process.argv.splice(2,2)[1]; |
之所以这么修改是因为
layaIde 编译 compile.js 打印的 process.argv 内容是
1 | ["/Applications/LayaAirIDE_beta2.3.0.app/Contents/Frameworks/Code Helper.app/Contents/MacOS/Code Helper","/Applications/LayaAirIDE_beta2.3.0.app/Contents/Resources/app/node_modules/gulp/bin/gulp.js","--gulpfile=/test/laya/demos/idedemo/.laya/compile.js","compile"] |
而我本地的 Webstorm 编译 gulpfile.js 打印的 process.argv 内容是
1 | ["/usr/local/bin/node","/Applications/LayaAirIDE_beta2.3.0.app/Contents/Resources/app/node_modules/gulp/bin/gulp.js","--no-color","--gulpfile","/test/laya/demos/idedemo/.laya/gulpfile.js","--tasks"] |
读者可以根据自己的环境 更改内容,以上便是如果使用Webstorm 编译Laya2.0项目.
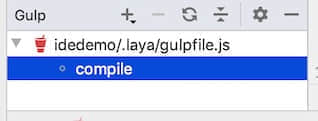
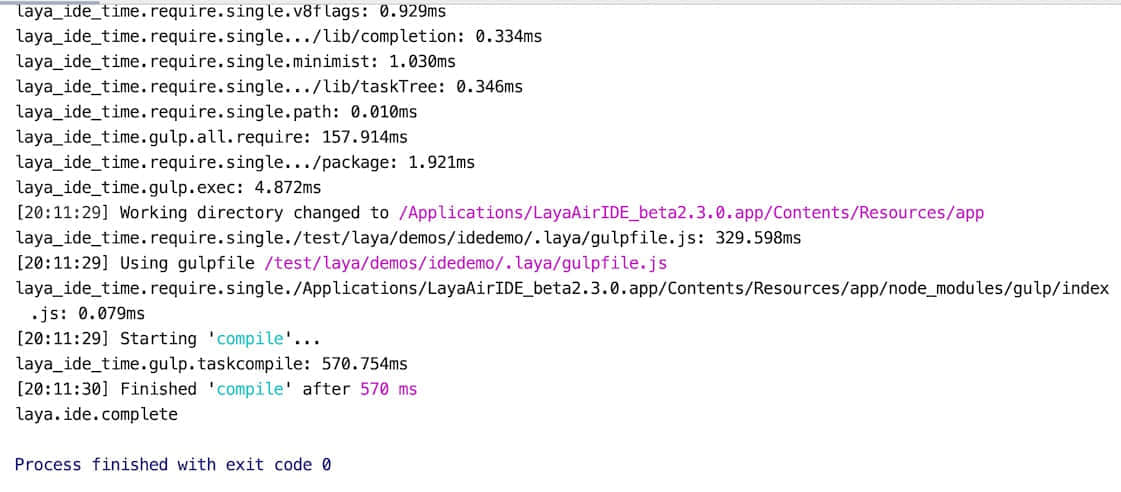
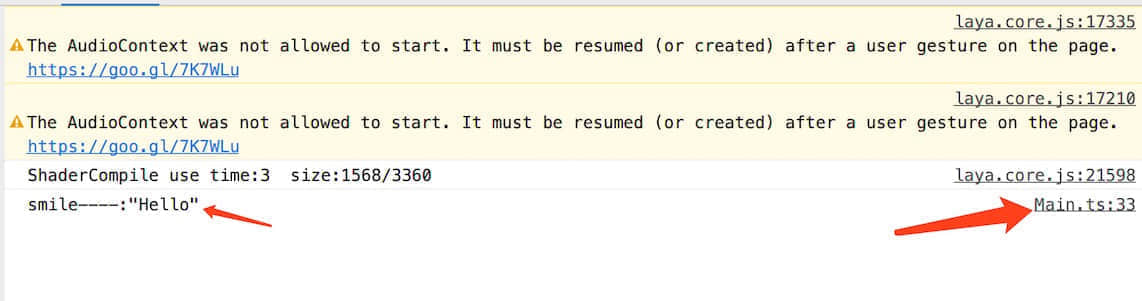
双击这个 compile 然后 发现 编辑通过
我们写一行输出
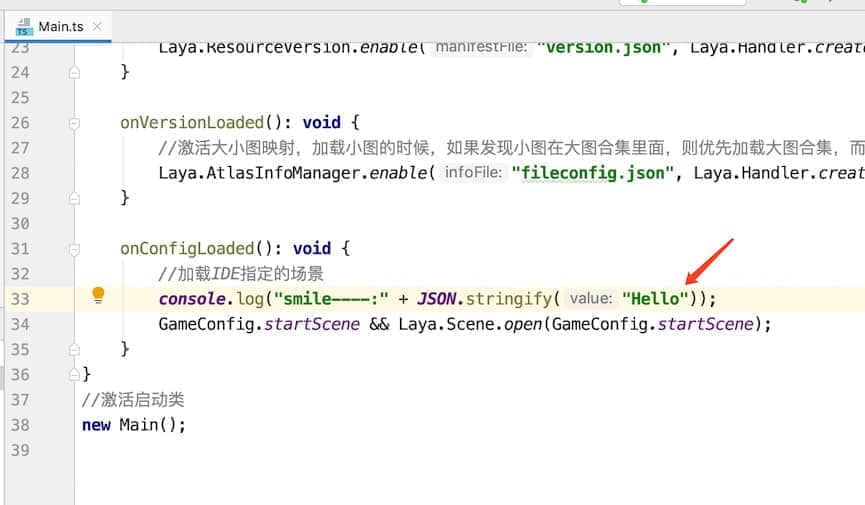
然后重新编译
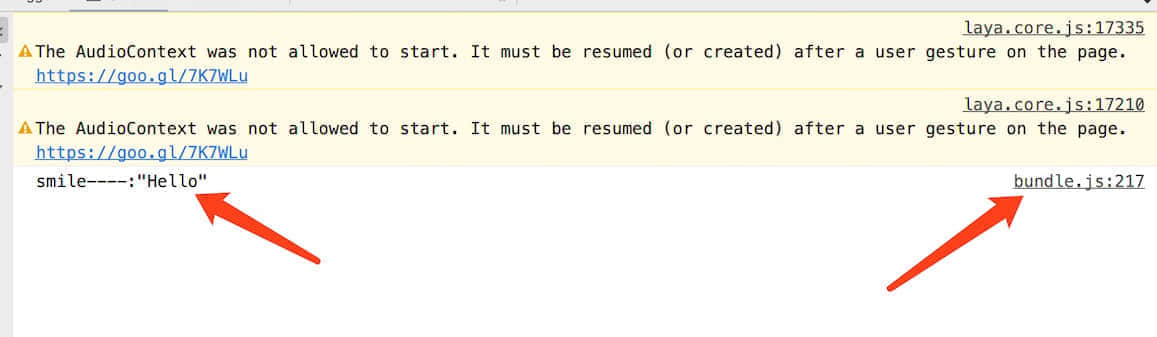
我们发现 正确输出 但是 文件路径指向了我们生成的 js 文件 这个不是我们要的
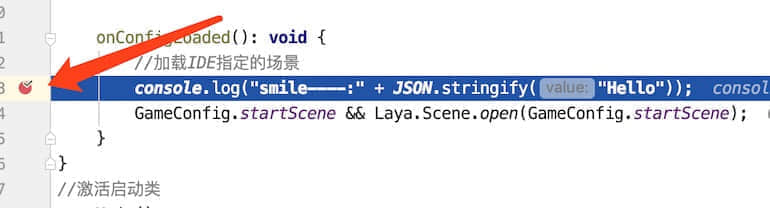
注意: 这样编译后,我们发现在调试的时候,编译器总是指向编译后的JavaScript文件,这个是个很头疼的时候,上次因为忙,今天得以进一步了解,其实还是参数的问题
需要修改代码:
原代码:
1 | //使用browserify,转换ts到js,并输出到bin/js目录 |
修改后
1 | //使用browserify,转换ts到js,并输出到bin/js目录 |
其实就是修改 sourcemap: true 而已
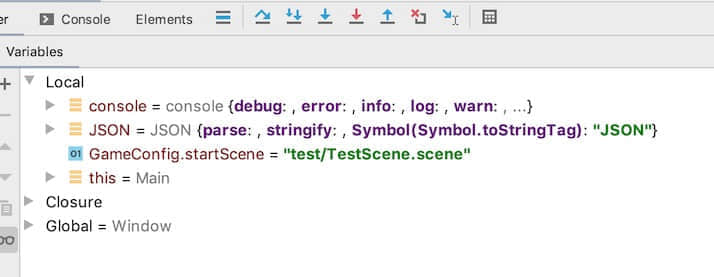
另外去修改 我们的项目配置文件 tsconfig.json 里面 的 tsconfig.json
1 | { |
同理也是 sourcemap: true 然后重新编译我们的项目
同理 也可以断点调试
以上 全部搞定
2019年12月20日 发现 本地环境更新 编译报错:
1 | semantic error TS2354: This syntax requires an imported helper but module 'tslib' cannot be found |
解决办法:参考链接 stackoverflow
Noob mistake (which I just made). Try:
or
Personally before signing off on Friday I did a
git clean -fxd, but nonpm iso all the npm packages were missing. Doh!
我只用了 npm install tslib 就成功解决问题。
另外关于Layabox1.x版本 和前面的2.x 版本 细节可以参考我的另外一篇文章