2018年9月15日,Layabox官方发布了全新的2.0系列,包括引擎和编辑器(LayaAir2.0),随后又发布了一个修复的版本。对于用Layabox引擎开发的小伙伴们,及时拥抱变化,学习新技能,让自己的项目或者游戏跑的更快,效率更高。
对于Layabox1.0,熟悉的人都应该很清楚,使用Typescript编码之后,在编译的时候,会在bin/js目录下面生成对应的后缀为.js文件。然后我们的代码是通过bin 目录下的 index.html 文件启动,通过加载对象的js类库,自定义的.js文件,运行游戏的。
习惯了WebStorm编码的同学,在写逻辑的时候,很多时候不管是界面还是快捷键或者是调试都感觉不太习惯,还好,二者可以很容易的兼容。
Layabox1.X配置教程
LayaAir1.0webStorm配置(默认你已经安装好了npm或者cnpm并且已经安装了typescript)
首先我们用LayaAir创建好了项目,打开我们根目录下面的tsconfig.json文件
1 | { |
看到什么变化没有?其实很简单了,就是添加了一行 "outDir": "bin/js",然后去设置一下Webstorm Language&Frameworks 下面的Typescript 设置就行,默认好像已经设置好了,你可以设置一下自己要编译的范围,这样在低配置的电脑上也可以很快,比如我的是 Current File,你看着自己设置即可。
Layabox2.0配置教程
新发布的编辑器(Layabox2.0)在创建项目的时候,添加了一些新的配置,使用了 npm里面的 几个模块 有 gulp、browserify、vinyl-source-stream、tsify等,这样在构建编译项目的时候,只生成一个js 文件,位于“bin/js/bundle.js”,看来官方做了优化,官网也说了他们是用了gulp的技术我们看到在.laya 文件夹下面的
/test/laya/webstorm/.laya/compile.js 里面大概用了这几个插件
LayaAir 新建项目 观察结构和插件
1 | //引用插件模块 |
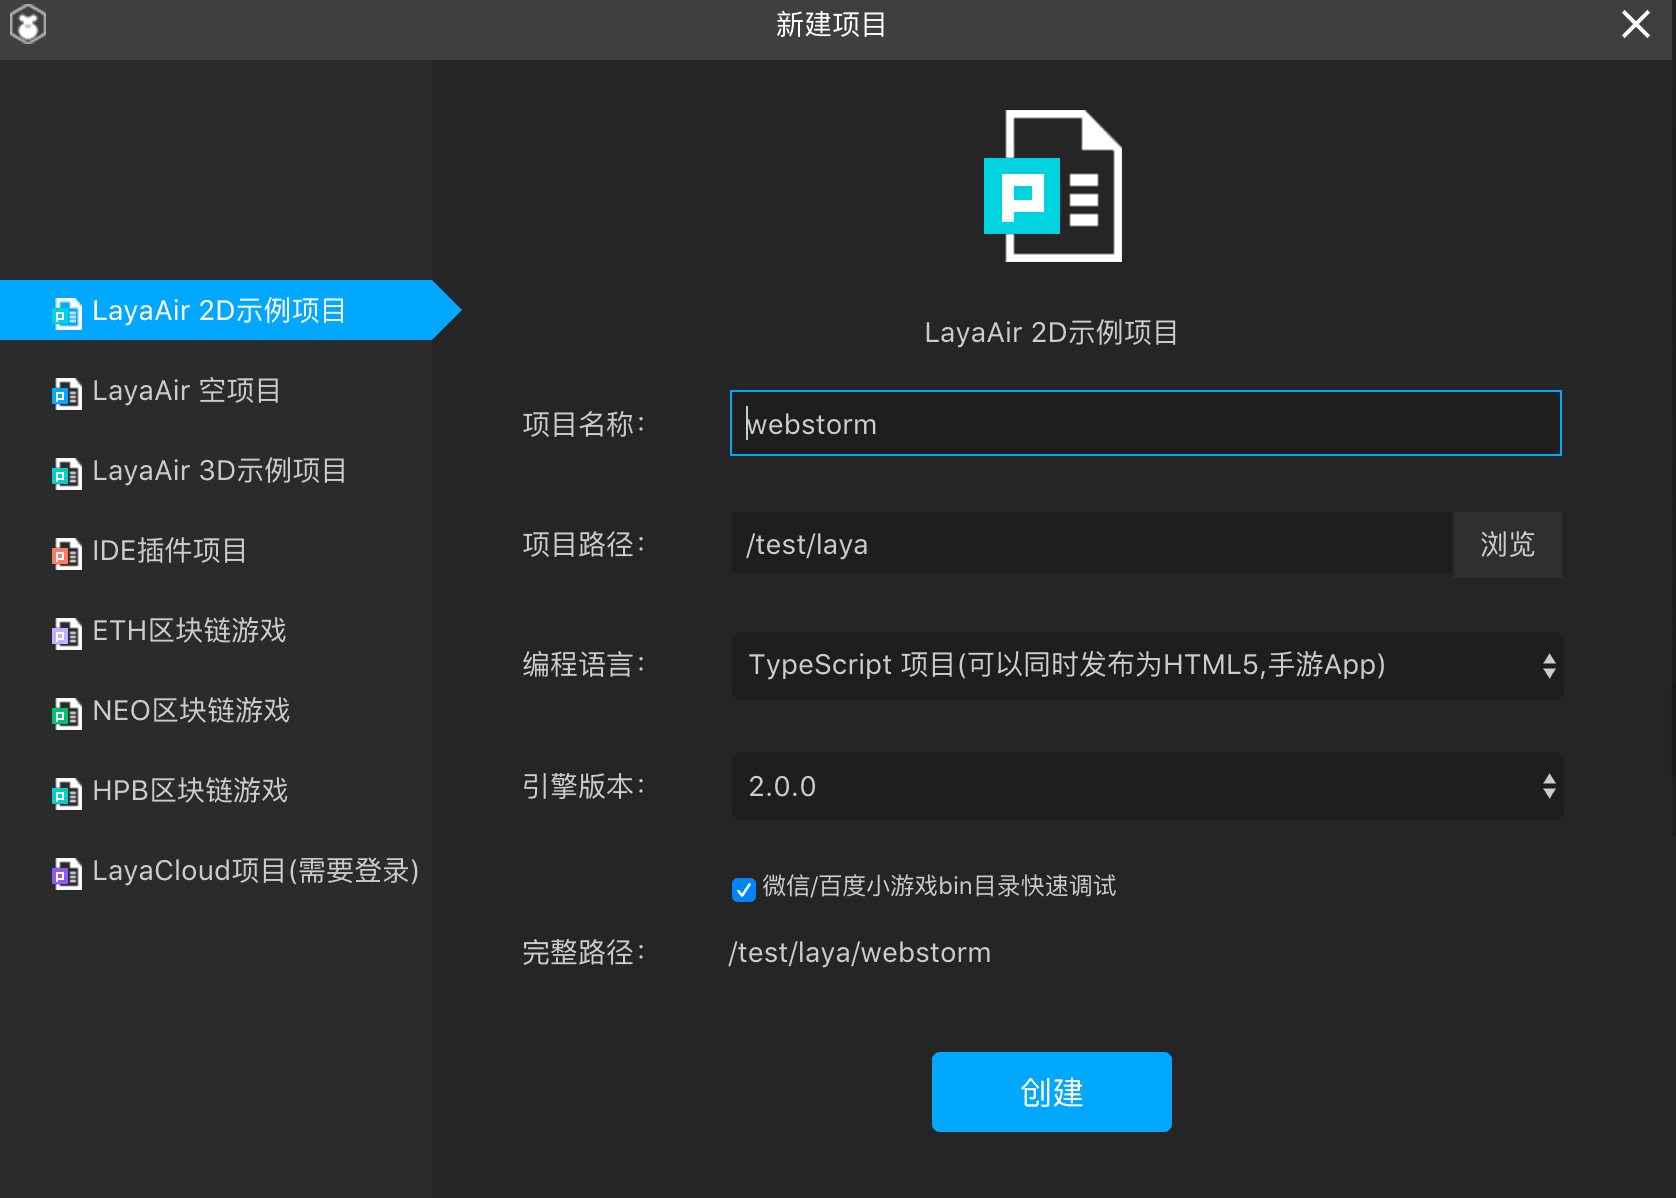
- 首先我们新建项目 比如 我的项目叫做 “webstorm” 项目地址位于“D:\SystemTemp\wbtest”,语言选择Typescript,然后点击创建按钮。
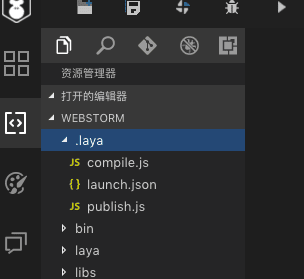
- 我们看一下新建的目录。大概是这样子
- 此时 我们的bin 目录下面 没有js 目录,我们点击上面的编译按钮就会生成一个名字为“/test/laya/webstorm/bin/js/bundle.js”的文件。

- 我们可以打开看一下 编译后的文件,发现是编译后的js为了证明我们配置成功,我们需要在原来的代码里面添加一个输出比如
Main.ts。
1 | onVersionLoaded(): void { |
- 我们在
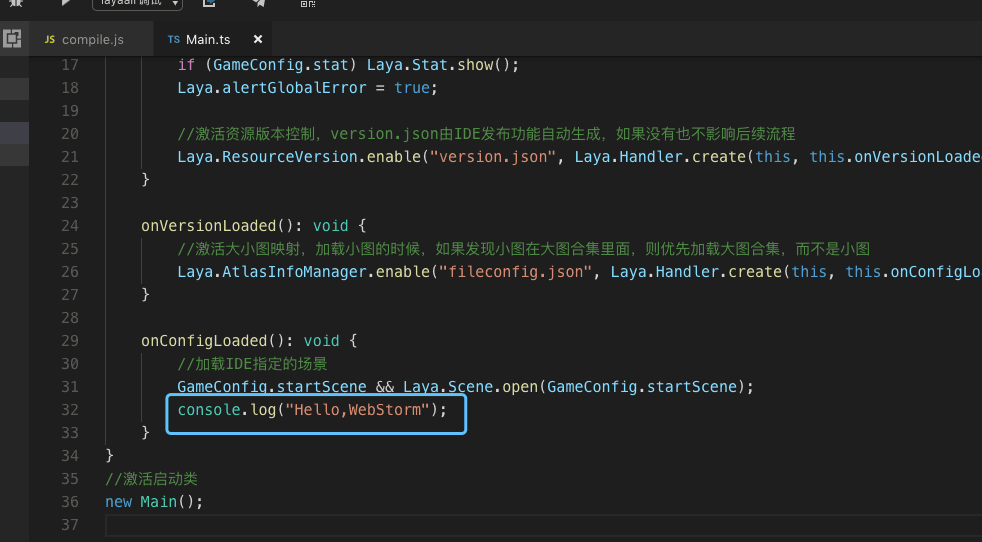
onConfigLoaded函数里写上一行代码,比如
1 | console.log("Hello,WebStorm"); |
- 原来的函数变成
1 | onConfigLoaded(): void { |
- 截图如下
Webstorm 配置项目
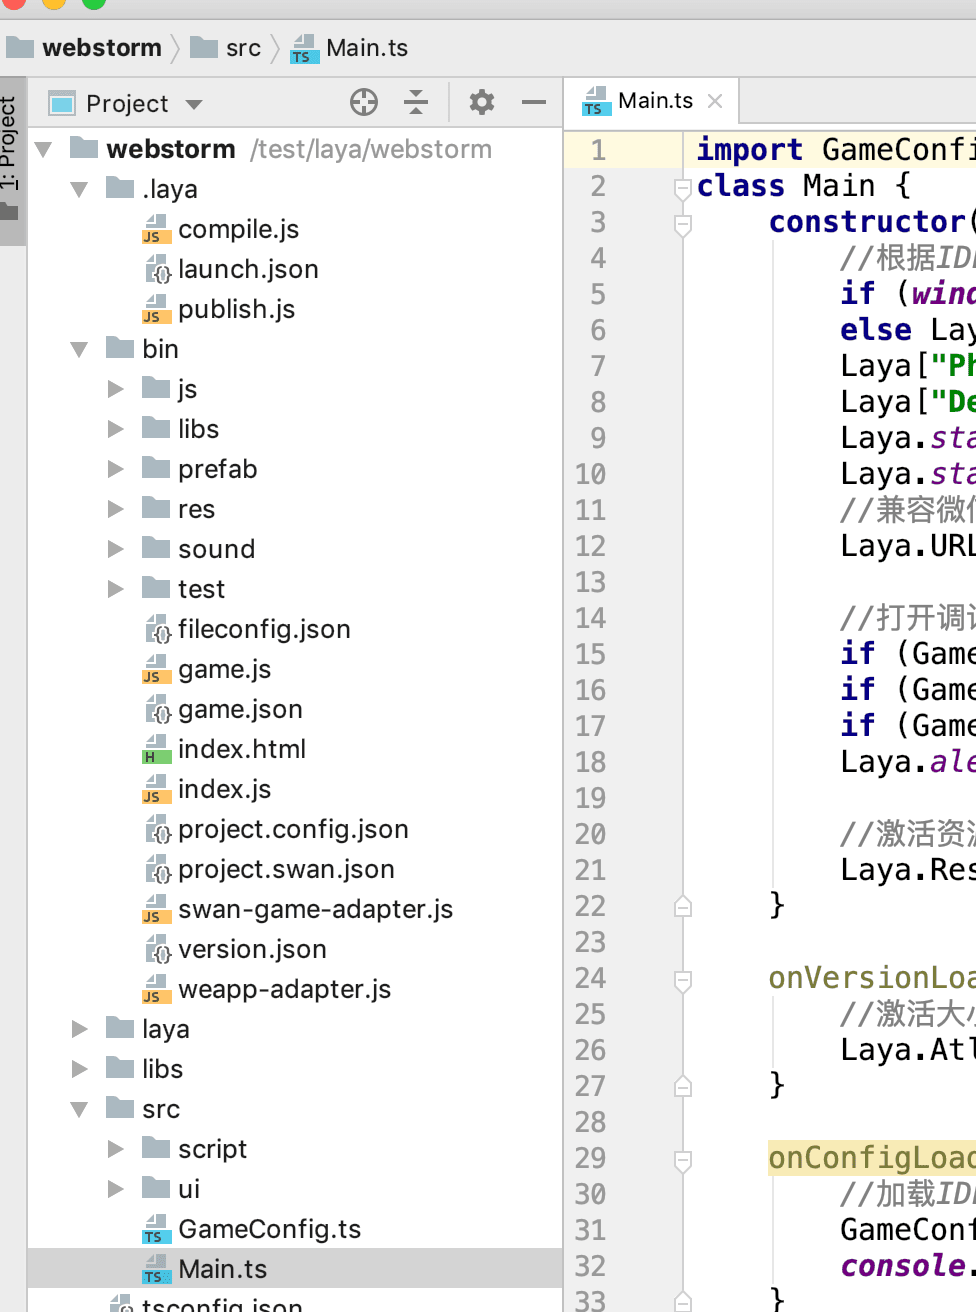
首先我们用webstorm 打开项目 查看目录
因为有时候在国内用npm命令有问题,我们可以选择用cnpm代替,此时我认为你已经安装好了cnpm环境。
- 首先我们需要安装一个全局的gulp(我是这样安装的,也许此步骤可以省去)
1 | cnpm install gulp -g |
- 然后全局安装
1 | cnpm install browserify -g |
1 | cnpm install vinyl-source-stream -g |
1 | cnpm install tsify -g |
- 此时我们的插件已经安装完毕,接下来需要我们调试 新建我们自己的
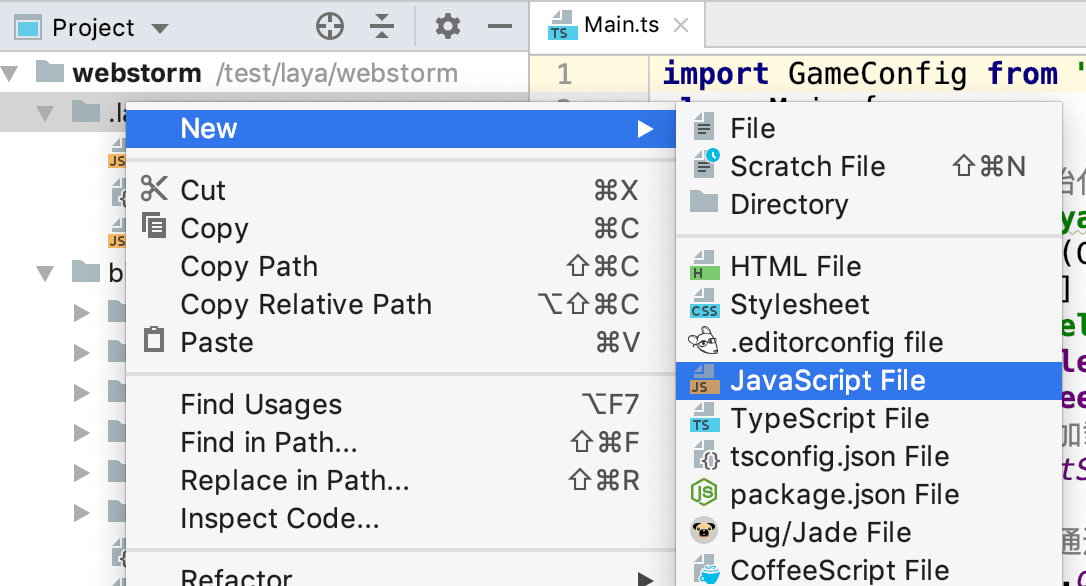
gulpfile.js,选择.laya/目录下面 点击右键菜单选择新建命令

- 我们此时 复制
/test/laya/webstorm/.laya/compile.js路径下面的js 的内容 粘贴到我们新建的文件里面
1 | // v1.0.0 |
- 我们此时要修改上面的文件 我们要修改 路径和插件地址,下面是我修改好的文件内容
1 | // v1.0.0 |
注意 里面的地址 需要你根据自己电脑的路径 分析 去设置 比如我process.argv的路径是:
1 | ["/usr/local/bin/node","/Applications/LayaAirIDE 2.app/Contents/Resources/app/node_modules/gulp/bin/gulp.js","--color","--gulpfile","/workspace/hotpot/.laya/gulpfile.js","compile"] |
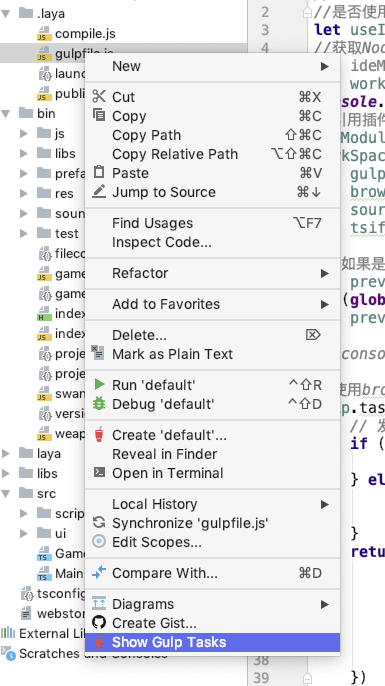
- 我们选择 我们新建的 gulpfile.js 文件 鼠标右键 选择 Show Gulp Tasks 菜单
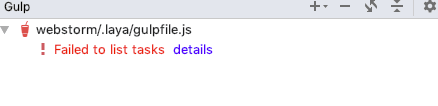
- 我们看到报错 然后我们点击蓝色的文字 配置我们的路径
- 然后继续点击蓝色的文字 选择
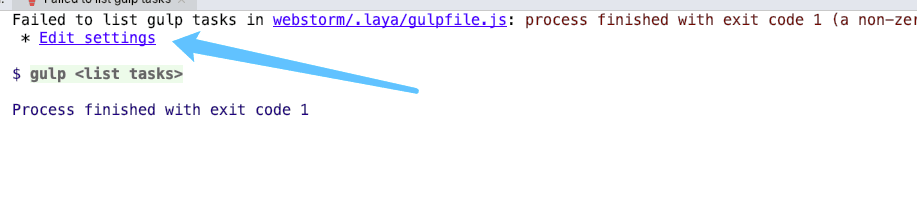
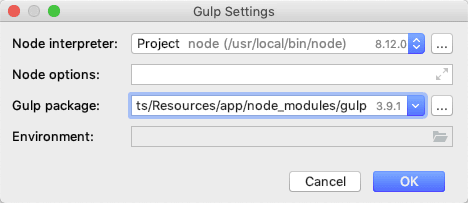
- 此时出现一个对话框

8.我们填入 本地机器上面 LayaAir 的里面的gulp的路径 比如我的是
1 | /Applications/LayaAirIDE2.app/Contents/Resources/app/node_modules/gulp |
- 点击确定 我们重新刷新我们的 gulp task 得到如下图所示

此时我们双击compile 文本 开始编译文件
1 | /usr/local/bin/node "/Applications/LayaAirIDE 2.app/Contents/Resources/app/node_modules/gulp/bin/gulp.js" --color --gulpfile /test/laya/webstorm/.laya/gulpfile.js compile |
发现我们已经 构建编译成功!!
验证结果
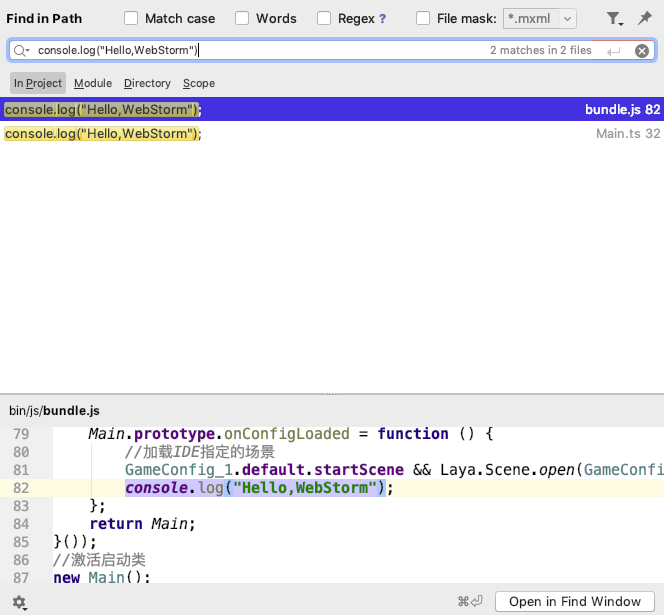
- 我们全局搜索
console.log("Hello,WebStorm")发现已经被编译到了 bundle.js 里面
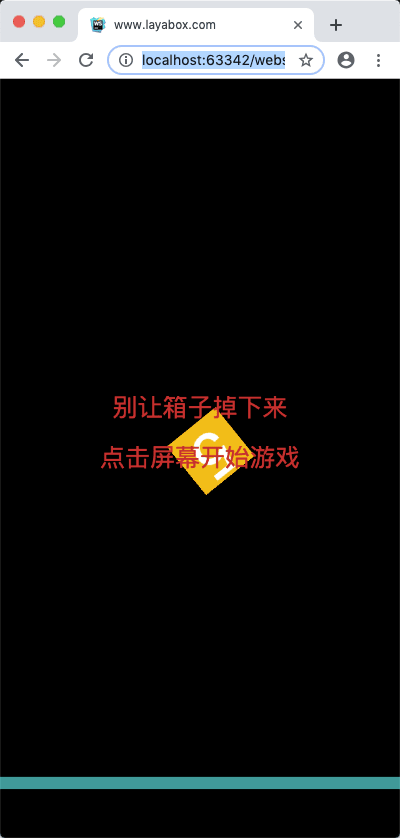
- 我们选择 bin 目录下面的index.html 文件 debug 调试
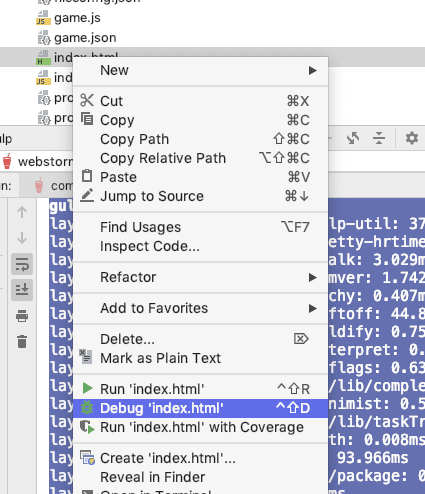
发现游戏可以正常玩,一切搞定。
LayaAir IDE 2.2.0beta4版本(更新于2019.08.24)
今天更新了引擎 这次发现官方更改了编译工具和插件需要新的配置。我鼓捣了半天,终于搞定,至于其中的根本内容我尚不清楚,目前先用一个可以编译的文件,我们知道 compile.js文件是官方的编译文件,我们的编译文件在同目录下面新建一个 名字为 gulpfile.js的文件。把compile.js 的全部内容复制过去。然后修改第一行代码
原代码
1 | let useIDENode = process.argv[0].indexOf("LayaAir") > -1 ? true : false; |
修改为
1 | let addvalue = process.argv.splice(2,2)[1]; |
之所以这么修改是因为
layaIde 编译 compile.js 打印的 process.argv 内容是
1 | ["/Applications/LayaAirIDE2.app/Contents/Frameworks/Code Helper.app/Contents/MacOS/Code Helper","/Applications/LayaAirIDE2.app/Contents/Resources/app/node_modules/gulp/bin/gulp.js","--gulpfile=/test/laya/ball/.laya/compile.js","compile"] |
而我本地的 Webstorm 编译 gulpfile.js 打印的 process.argv 内容是
1 | ["/usr/local/bin/node","/Applications/LayaAirIDE2.app/Contents/Resources/app/node_modules/gulp/bin/gulp.js","--color","--gulpfile","/test/laya/ball/.laya/gulpfile.js","compile"] |
读者可以根据自己的环境 更改内容,以上便是如果使用Webstorm 编译Laya2.0项目.
注意: 这样编译后,我们发现在调试的时候,编译器总是指向编译后的JavaScript文件,这个是个很头疼的时候,上次因为忙,今天得以进一步了解,其实还是参数的问题
需要修改代码:
原代码:
1 | //使用browserify,转换ts到js,并输出到bin/js目录 |
把后面的代码 修改:
1 | return bundle.write({ |
把 ”sourcemap“这个配置修改成为true 后 调试的文件就指向了我们编码的ts文。至此完美解决问题,升级引擎。
总结
总的来说,这次配置花费了我不少精力,之前一直找,没有遇到合适的方法,后面反复测试,查看官网Laya项目目录结构和文档,最后总算是配置成功了,当然里面也还有许多不足,比如个别路径不能改成 参数化,学习嘛,一点点进步,以后继续努力,继续加油!
后记
2019 年3月5日更新,今天在群里,有群友提醒 可以用另外一种办法 就是 官方给了 命令行工具
链接地址 :https://npm.taobao.org/package/layaair2-cmd
整个 2.0 的介绍 https://mp.weixin.qq.com/s/AMS7xEqVbLpbfo2F5li3vw
1、layaair2-cmd 安装方式
如果有npm安装都不会用的开发者请面壁并跳过命令行发布文档,老老实实的用LayaAirIDE的界面发布。
2、layaair2-cmd 都支持哪些命令
我们通过输入
layaair2-cmd -h回车后 可以查看到layaair2-cmd的帮助信息,回车后输出内容如下:
2
3
4
5
6
7
8
9
10
Options:
 -v, --version  output the version number
 -h, --help     output usage information
Commands:
 compile        compile project.
 publish        publish project.
help [cmd] display help for [cmd]layaair2-cmd的帮助说明:
帮助中首先给出了命令的使用范例:
说明:layaair2-cmd 后面先是 具体对应命令,然后是该命令的参数。
2
3
-v, --version output the version number
-h, --help output usage information说明:不输入命令的时候
-h打印输出的是刚刚看到的layaair2-cmd帮助说明。-v打印输出的是layaair2-cmd版本号。当然,如果输入具体命令,那 -h 和 -v 就是对应命令的帮助说明和版本号了。
2
3
4
compile compile project.
publish publish project.
help [cmd] display help for [cmd]说明:那layaair2-cmd都支持哪些命令呢,-h的帮助说明里也直接给出了三个命令,compile、publish、help。
compile是项目编译命令,该命令会生成编译后的JavaScript文件,相当于IDE里的F8编译。这里需要注意的是,如果发布面板那里勾选了是否重新编译项目,那开发者在自己的命令行发布流程里就不要再调用这个命令了,否则会导致项目被编译两次,浪费发布时间。
publish是项目发布,相当于发布面板里点击了发布按钮。这块比较重要,一会拿出来单独介绍。
help是layaair2-cmd的帮助说明,与layaair2-cmd -h显示效果一样。3、项目发布命令的使用与注意事项
我们还是先通过
layaair2-cmd publish -h查看一下发布命令的帮助。回车后输入内容如下:
2
3
4
5
6
7
Options:
-v, --version output the version number
-c, --config <configPlatform> Set the publishing platform name[web|wxgame|qqw
anyiwan|bdgame]
-h, --help output usage information我们通过帮助可以看到,最关键的参数是
-c,目前支持web、wxgame、qqwanyiwan、bdgame这四个参数。
web是发布HTML5的web版本。
wxgame是发布微信小游戏平台。
qqwanyiwan是发布QQ轻游戏平台(也叫QQ玩一玩)。
bdgame是发布百度小游戏平台。使用示例如下:
发布注意事项
- layaair2-cmd的项目编译(compile)与项目发布(publish)命令必须要在项目的根目录来执行使用。
- 在调用项目发布命令行前要检查一下,是否有发布平台对应的json,比如发布web版,项目文件夹
.laya目录下,应该有web.json。发布微信小游戏要有wxgame.json。同理,其它小游戏也要有对应的json。如果没有的,那先用LayaAirIDE的发布3.0工具选择对应的平台手工发布一次(特别提醒,一定要用3.0发布工具),发布工具会自动生成对应的json。json中保存的是发布工具中那些发布筛选规则与发布配置信息。
我自己在电脑上运行了由于一些包的更新和不支持没有成功,但是群里有人是成功的,大家可以借鉴这些办法。
注意:
layaair2-cmd依赖于gulp,使用前请确保已经正确安装全局gulp。
所有命令都要在项目所在根目录运行。